

Gratitude and Gains: Using Mindset to Reduce Holiday Stress and Stay Consistent
The holiday season, while joyful, is a marathon of added stress: travel logistics, financial worries, and the pressure to be "perfect."

Image courtesy of Aveedibya Dey via Unsplash
The holiday season, while joyful, is a marathon of added stress: travel logistics, financial worries, and the pressure to be "perfect." This mental stress can be just as damaging to your fitness and health goals as overeating, as it spikes cortisol (the stress hormone) and makes consistent action feel impossible.
This year, let's use the power of your mindset to not just cope with the holiday stress, but to actively reduce it and protect your precious routine. The strategy? Focusing on Gratitude and accepting "Good Enough" over perfection.
1. The Gratitude Grounding Technique
Stress thrives on fear, lack, and comparison. Gratitude is the direct antidote. Taking a few moments each day to focus on what you have (your "wins") can immediately lower your stress hormones and anchor you in a positive state.
The Strategy: Every morning, before you check your phone or start cooking, list three things you are genuinely grateful for.
Holiday Application: Be specific about your gratitude. Not: "I'm thankful for my family." Try: "I'm grateful my flight arrived safely," or "I'm thankful for the quiet 10 minutes I took for myself this morning."
Why it works: This simple practice interrupts the anxious "what if" thought loop. It reminds you of your resources and shifts your focus from external demands to internal appreciation. This stronger mental state makes you far more resilient against holiday pressures.
2. The Power of "Good Enough" Consistency
Holiday travel, hosting, and busy schedules are going to disrupt your normal routine. Trying to force a 60-minute workout or a perfect diet will only lead to stress and eventual burnout.
The Strategy: The 80% Rule. Accept that 80% effort during the holidays is a massive win. Your goal shifts from gaining to maintaining your strength and habits.
Holiday Application:
Workouts: A 15-minute bodyweight circuit in a hotel room is good enough. A brisk walk with family is good enough. Don't skip movement entirely just because you can't get to your preferred gym.
Nutrition: Hitting your protein goal at two meals a day is good enough. Drinking your full water intake is good enough. Focus on the few things that give you the biggest return (like protein, water, and sleep) and let the rest slide.
The Legacy Lesson: Consistency doesn't mean perfection; it means showing up in a way that is manageable, even during chaos. By accepting "good enough," you eliminate the stress of failure and ensure you keep your streak going strong into the New Year.
3. Set Boundaries: The Gift of "No"
Feeling overwhelmed often comes from over-committing your time and energy to others. To maintain your sanity and routine, you have to be able to say no.
The Strategy: Set clear boundaries around your personal health time. This is not selfish; it is essential.
Holiday Application: Politely decline one social invitation that adds too much stress, or firmly block out 30 minutes in the morning for your non-negotiable movement. For example: "I would love to help with breakfast, but I need a 30-minute walk first to clear my head."
The Legacy Lesson: Protecting your well-being serves everyone around you better. A rested, calm, and grounded you is a far better host, guest, and family member than a stressed-out, depleted one.
Use the powerful combo of gratitude and flexible consistency this holiday season. By managing your mindset first, you create a calm foundation that keeps your body and your goals perfectly aligned, ensuring your gains stick and your stress levels drop.

How to Hack Your Plate: The 3:1 Rule for Balanced Holiday Meals
Holiday plates are famous for being overloaded, usually with a mountain of carbohydrates (mashed potatoes, stuffing, yams) and very little else.

Holiday plates are famous for being overloaded, usually with a mountain of carbohydrates (mashed potatoes, stuffing, yams) and very little else. This imbalance is the real culprit behind the heavy, sleepy feeling you get after a big meal.
To combat the chaos of the holiday buffet, you need a simple, visual guide that ensures your plate stays balanced. The best way to do this is with the 3:1 Rule for Plate Hacking.
The 3:1 Rule is simple: For every 3 parts of starchy food you take, you must take 1 part of protein.
This isn't a restrictive rule; it's a strategic one. It forces you to build the structural foundation of your meal first (protein and fiber) before you indulge in the delicious but heavy starches.
The Three-Step Plate Hacking Method
When you approach the buffet, follow this order to build a balanced plate that supports stable energy and good digestion.
Step 1: The Foundation (The First Half of Your Plate)
Focus on filling half of your plate with non-starchy vegetables and greens. These foods are low in calories and high in fiber, which helps slow down the digestion of everything else you eat.
Holiday Hacks: Green beans (skip the fried onions on top), side salad, roasted carrots, or raw veggie sticks.
The Goal: Make fiber your priority. If you start here, you'll naturally be too full for a second plate of heavy food.
Step 2: The Structure (The Protein Anchor)
Fill one-quarter of your plate with your main protein source. Protein is essential for satiety and keeping your blood sugar steady.
Holiday Hacks: Focus on the leanest cuts of turkey breast. Avoid or limit dark meat or heavily buttered ham, which add unnecessary fat and calories.
The Goal: Make this a substantial serving. Protein should be the densest food on your plate.
Step 3: The Reward (The Last Quarter)
Only now do you address the starches and sauces. Use the final quarter of your plate for the heavy, higher-calorie holiday items. This is where the 3:1 Rule comes into play.
The 3:1 Rule in Action: For a scoop of mashed potatoes (3 parts), make sure you have a balanced amount of turkey (1 part) to follow it. This encourages you to enjoy the starches in moderation.
Holiday Hacks: Choose your absolute favorite, stuffing, mashed potatoes, or yams, and take a moderate portion. Don't feel obligated to try every single dish.
The Psychology of the Small Plate
Beyond the 3:1 ratio, use a smaller dinner plate if one is available. This is a simple visual hack:
Small Plate, Big Impact: A moderate portion size looks generous on a small plate, satisfying the psychological need to feel full. The same portion size looks skimpy on a large plate.
Take One Trip: Commit to taking one trip to the buffet. If you still want more 20 minutes after you finish, take a second trip, but often, the physical feeling of fullness will have caught up, and the craving will be gone.
The holidays are about celebrating abundance, not restriction. By using the simple 3:1 Rule and strategic plate hacking, you ensure that abundance is focused on the foods that fuel your body—leaving you feeling energized and strong, not sluggish and guilty.

The Pre-Feast Power Workout: 30 Minutes to Boost Your Metabolism Before the Turkey
This Thanksgiving, wake up, get moving for 30 minutes, and enjoy the metabolic and mental boost it gives you.
Thanksgiving morning is often a blur of preparing food, traveling, or just relaxing before the main event. But dedicating a quick 30-minute power workout before the feast is one of the smartest things you can do for your body, your mind, and your metabolism.
This isn't about "earning" your calories; it's about optimizing your body's resources. A morning workout improves your body's ability to handle the large influx of food, boosts your mood, and sets a positive, energized tone for the entire holiday.
Here is why a pre-feast workout is non-negotiable and a simple, highly effective routine you can do in 30 minutes, right at home.
The Metabolic Advantage (The Scientific Reason)
When you do a quick, challenging strength and conditioning circuit, you set up a metabolic advantage for the rest of the day:
Increases Insulin Sensitivity: Exercise immediately makes your muscles more receptive to glucose. This means that when the holiday starches hit your bloodstream later, your muscles are primed to absorb that glucose for energy and storage, rather than letting it linger in your blood or immediately storing it as fat. This is a huge win for managing the holiday meal.
The EPOC Effect (The Afterburn): A challenging workout creates an "afterburn" effect known as Excess Post-exercise Oxygen Consumption (EPOC). This keeps your metabolism elevated for hours after the workout is over, meaning you burn more calories at rest while you are sitting down enjoying your meal.
Appetite Regulation: Believe it or not, a burst of intense exercise can actually help regulate your appetite and prevent overeating, ensuring you stop when you are satisfied, not stuffed.
The 30-Minute Total Body Circuit (No Equipment Needed)
This circuit focuses on compound movements—exercises that use multiple large muscle groups—to maximize your metabolic engine in minimal time.
Instructions: Perform 10-12 repetitions of each exercise, moving directly from one to the next with minimal rest. Rest for 60 seconds after completing all five exercises. Complete the entire circuit 4 times for a killer 30-minute workout.

The Mental Advantage (The Mindset Reason)
Beyond the science, the greatest benefit is how a morning workout makes you feel.
Positive Momentum: Completing a tough workout before noon sets a powerful, proactive tone for the day. You start the holiday feeling accomplished and energetic.
Guilt-Free Enjoyment: Having maintained your commitment to fitness allows you to sit at the table with genuine, guilt-free pleasure. Your workout was a gift to yourself; the feast is a gift to enjoy with family.
This Thanksgiving, wake up, get moving for 30 minutes, and enjoy the metabolic and mental boost it gives you. You'll not only feel stronger when you sit down for the feast, but you'll feel better when you stand up afterward.

Mindful Indulgence: A Guilt-Free Guide to Enjoying Holiday Treats
Mindful indulgence means accepting that treats are part of the holiday experience and deciding how you will enjoy them before you take the first bite.

Image courtesy of Nadiia Shuran via Unsplash
The weeks between Thanksgiving and New Year's Day often turn into an all-or-nothing eating pattern. We tell ourselves, "I can't eat that cookie!" or "I'll start over in January." This mindset leads to a cycle of restriction, followed by guilt-ridden bingeing, followed by more restriction.
This year, let's replace the guilt with a strategy of Mindful Indulgence. This approach is based on the idea that health isn't measured by one day or one meal, but by consistent habits over time. It gives you permission to fully enjoy the unique treats of the holiday season while keeping your long-term goals firmly in view.
Mindful indulgence means accepting that treats are part of the holiday experience and deciding how you will enjoy them before you take the first bite.
Rule 1: Pre-Decide the Treat, Not the Restriction
The moment you see a plate of your favorite holiday cookies, the emotional brain takes over. Don't wait until that moment to decide.
The Strategy: The 2-Treat Rule. Before you walk into a party or start a holiday dinner, look at the menu (or the dessert table) and decide, "I will enjoy two of my absolute favorite treats tonight."
Why it works: This removes the emotional fight ("Should I or shouldn't I?") and replaces it with a calm decision ("Which one should I choose?"). It shifts your focus from avoidance to selection, making the experience feel intentional and enjoyable, not accidental and guilty.
Rule 2: Engage All Five Senses
When you mindlessly eat a handful of treats while doing something else (like watching a movie or talking), you don't actually register the taste, but you still absorb the calories.
The Strategy: The Slow-Down Test. When you indulge, do so fully. Put your chosen treat on a small plate, sit down, and focus only on the food for a few minutes.
How to do it: Look at the treat, notice the color and texture. Smell the treat, notice the spices and warmth. Take a small bite and chew it slowly, focusing on the flavor profile (sweet, spicy, salty). The goal is to get 100% satisfaction from 25% of the food. When the satisfaction drops below 100%, put it down.
Rule 3: Build the Buffer Zone
Mindful indulgence doesn't mean ignoring your habits; it means strengthening them to support your indulgences. You build a "buffer zone" of healthy choices around the occasional treat.
Prioritize Protein First: Every day, ensure you hit your protein target (around 0.7g/lb of bodyweight). Protein keeps you full, supports your metabolism, and stabilizes blood sugar. If you fill up on protein and fiber first, you'll naturally have less room and less desire for simple sugars.
Don't Skip the Workout: The minute you decide to indulge, commit to your workout the next morning. Knowing you have a workout planned reinforces your identity as an active person and prevents the guilty feeling of "giving up." The workout is not punishment; it's a non-negotiable part of your routine.
Rule 4: Embrace the 80/20 Rule for the Whole Season
No one single meal or single treat will derail your goals. It is the continuous stream of "little cheats" that turns a week into a setback.
The Mindset Shift: Focus on controlling the 80% of your time that is not a holiday party. This means returning to your core habits (protein, veggies, water, sleep) immediately after the holiday event is over.
The Legacy Lesson: Think of the season as a marathon, not a sprint. The goal is to cross the finish line feeling good. By being intentional with your treats and consistent with your core habits, you eliminate the need for a frantic "January detox." You prove that healthy living is flexible enough to include joy, celebration, and tradition.
This holiday season, give yourself the gift of presence and peace. Replace the guilt with intentionality, and enjoy your holiday treats mindfully.

Meal Sequencing: The Simple Trick to Better Blood Sugar Control at Your Holiday Table
The holidays are a wonderful time for celebration, but they often come with a side of worry about heavy meals and blood sugar spikes.

Image courtesy of Megan Watson via Unsplash
The holidays are a wonderful time for celebration, but they often come with a side of worry about heavy meals and blood sugar spikes. When you’re faced with a lavish holiday spread complete with starches, desserts, and rich gravies, it’s easy to feel sluggish afterward, a common sign of a big blood sugar roller coaster.
But what if you could enjoy the food you love and dramatically reduce that post-meal crash without dieting or cutting carbs?
The secret lies in meal sequencing: simply changing the order in which you eat your foods. This powerful, simple trick leverages science to protect your blood sugar, reduce insulin spikes, and keep your energy stable, allowing you to enjoy your holiday meal without the guilt or the crash.
The Science: Why Order Matters
When you eat food, your body breaks down carbohydrates into glucose (sugar), which enters your bloodstream. The faster this happens, the higher the spike.
The key players in meal sequencing are fiber, fat, and protein. These three nutrients slow down digestion and create a physical barrier in your stomach and small intestine.
If you eat carbs first (like a roll or mashed potatoes), they hit your system fast. If you eat fiber, protein, and fat before those carbs, they coat the intestinal walls, acting like a traffic jam to slow the absorption of glucose.
The Best Sequence: Veggies ➔ Protein ➔ Starches
To use meal sequencing effectively at the holiday table, simply apply this proven order:
Step 1: The Starter: Veggies and Salad (The Fiber Barrier)
Begin your meal with the non-starchy vegetables (like green beans, salad, or raw carrots) and a protein-rich appetizer.
Action: Eat your fiber first! A high-fiber start helps create that viscous, gel-like barrier in your gut that slows down the entire digestive process.
Holiday Application: Start with a small salad, green bean casserole (focus on the beans, not the crunchy topping), or even a few stalks of celery.
Step 2: The Main Event: Protein and Healthy Fats (The Speed Bump)
Move on to the turkey, ham, or any other protein source, along with healthy fats (like avocado or nuts, if available).
Action: Protein requires more complex digestion and dramatically slows down gastric emptying (how fast food leaves your stomach). This provides the major braking action for the incoming glucose.
Holiday Application: Focus on a generous serving of turkey breast or your main protein, savoring it before moving on.
Step 3: The Finale: Starches and Sugars (The Slow Release)
Finish your plate with the heavier starches, breads, and desserts.
Action: Because the carbs are entering an environment already rich in protein and fiber, the glucose from the mashed potatoes, stuffing, or pie will be absorbed over a longer, gentler period. This flattens the blood sugar curve.
Holiday Application: Take a moderate portion of your favorite starch, but eat it last. This is not about restriction; it's about strategic placement.
Simple Rules for the Holiday Table
Don't Load the Plate All at Once: If you put everything on your fork at the same time, you negate the sequencing effect. Take a few bites of turkey, then a few bites of green beans, and finish with a small scoop of potatoes.
Take Your Time: Meal sequencing works hand-in-hand with mindful eating. Slow down and chew your food thoroughly. This aids digestion and gives your body's satiety hormones time to kick in.
Stay Hydrated: Drink water throughout the meal, but avoid sugary drinks, which deliver glucose straight into your system without the benefit of fiber or protein.
This year, treat your holiday meal as a simple science experiment. By using the secret of meal sequencing, you can enjoy all the wonderful flavors of the season while giving your body the stability it needs to keep your energy high and your focus sharp, all the way to dessert.

How to Read Your Own Body: Tuning in to Your Hunger, Energy, and Thirst Cues
The skill of tuning in, or listening to your own internal cues, is the foundation of intuitive eating, smarter training, and living a truly balanced, high-energy life.

In our fast-paced, screen-obsessed world, we often live "outside" our bodies. We rely on apps to tell us when to sleep, social media to tell us what to eat, and complicated formulas to tell us when to drink water.
But your body is actually a genius. It gives you constant, subtle feedback on exactly what it needs, when it needs it. The skill of tuning in, or listening to your own internal cues, is the foundation of intuitive eating, smarter training, and living a truly balanced, high-energy life.
Learning to interpret the signals your body is sending about hunger, energy, and thirst will empower you to stop following rigid external rules and start following your body’s true, deep wisdom.
1. Decoding Hunger: Beyond the Growl
We've already talked about the three types of hunger (physical, emotional, sensory). Mastering this skill means recognizing the subtler signals of true physical hunger before you reach the point of "hanger."
Early Signal: A slight drop in focus or mental sharpness. Your brain is the most energy-demanding organ, so mental fog is often the very first sign of needing fuel.
The Best Response: When you notice mental fog or a subtle, hollow feeling, eat a balanced snack or a meal (protein + fiber). Don't wait until you're ravenous and have lost all control over your food choices.
The Legacy Lesson: Eating when moderately hungry, and stopping when satisfied (not stuffed), keeps your energy stable and optimizes your digestion.
2. Decoding Energy: Understanding Fatigue
If you're constantly relying on coffee or sugary snacks to get through the day, you're masking a deeper message your body is sending you about energy management.
Signal 1: The Crash (Post-Lunch Slump): This is usually a sign that your last meal was unbalanced—too high in fast carbs and too low in protein/fiber.
The Best Response: Next time, build your plate around protein and vegetables first. If the crash hits, don't eat; instead, stand up and move for 5 minutes (a micro-workout!) to get blood flowing.
Signal 2: Morning Sluggishness: This is often a sign of poor sleep quality (not just duration).
The Legacy Lesson: Recognize that if you feel tired despite 8 hours of sleep, you need to focus on sleep quality (dark, cool room, less screen time before bed), not just duration.
3. Decoding Thirst: The Hidden Headache
Most people wait until they are genuinely thirsty before drinking, but thirst is often one of the last signals of dehydration. By the time you feel parched, your energy and performance are already suffering.
Early Signal: Headaches or irritability. Mild dehydration is one of the most common, overlooked causes of tension headaches and a sour mood.
The Next Signal: Dark or highly yellow urine. Pale straw color is the goal. If your urine is dark, you need water immediately.
The Legacy Lesson: Stop drinking just water. Drink water because you’ve created a visual cue (a water bottle on your desk) or linked it to a habit (after every bathroom break, drink a full glass). Staying properly hydrated boosts metabolism, flushes toxins, and keeps your mental clarity sharp.
The Body Check-In: Your Daily Practice
Learning to read your body takes practice. Use this quick check-in several times a day to tune in:

Your body is constantly telling you what it needs to perform optimally. By simply pausing, observing, and responding to these cues, you take back control from external noise and commit to a sustainable, self-aware path to lifelong wellness.

Cooking Once, Eating Thrice: Your Weekend Guide to Effortless Meal Prep for the Week
The biggest enemy of healthy eating isn't a lack of knowledge; it's a lack of time.

Image courtesy of Ella Olsson via Unsplash
The biggest enemy of healthy eating isn't a lack of knowledge; it's a lack of time. When you’re exhausted after a long workday, ordering takeout or heating up something highly processed is just easier than cooking a healthy meal from scratch.
This is where the strategy of "Cooking Once, Eating Thrice" saves the day. Instead of spending your valuable time cooking every single night, you dedicate a few hours on a weekend afternoon to preparing large batches of simple building blocks. This small investment of time acts as an insurance policy against poor food choices all week long, ensuring you have healthy, satisfying meals ready to assemble in minutes.
This guide will show you how to focus your weekend prep on three versatile components that can be mixed and matched into multiple meals throughout the week.
The Weekend Warrior Prep Strategy
Aim for about two hours of focused time on Sunday afternoon. You're going to prep one main protein, one versatile carb, and one large batch of vegetables.
1. The Protein Anchor (The Muscle Fuel)
Protein is the most important component for satiety (feeling full) and muscle maintenance. Make a large batch of a neutral, versatile protein that can fit into any meal.
Prep: Cook 3–4 pounds of a single protein source.
Chicken Breast/Thighs: Bake, grill, or shred in a slow cooker with minimal seasoning (salt, pepper, garlic powder).
Ground Turkey/Beef: Cook in a large skillet, drain the fat, and leave it mostly unseasoned.
Lentils or Chickpeas: Cook a large batch on the stovetop or use canned options (rinsed well).
Storage: Divide the cooked protein into individual portion containers (e.g., 4–6 ounces per portion) and store in the fridge.
2. The Versatile Carb (The Energy Base)
These ingredients are your energy sources. Choose a complex carbohydrate that reheats well and provides good fiber.
Prep: Cook 6–8 cups of a grain.
Quinoa: Cooks quickly and is high in protein and fiber.
Brown Rice or Farro: Great for salads and bowls.
Sweet Potatoes: Bake 5–6 whole sweet potatoes, then mash or cube them for easy reheating.
Storage: Keep the cooked grains/potatoes in a large, sealed container. They will last 4–5 days in the fridge.
3. The Bulk Veggies (The Fiber & Volume)
This is where you add volume, color, and essential nutrients. Focus on vegetables that are easy to prep or cook in large batches.
Prep:
Roast: Toss a large tray of sturdy vegetables like broccoli florets, Brussels sprouts, carrots, and onions with a little olive oil, salt, and pepper. Roast at 400°F until tender-crisp.
Chop Raw: Chop a large bowl of fresh veggies like cucumbers, bell peppers, carrots, and celery sticks. These are perfect for snacking or quick salad additions.
Storage: Store roasted veggies in their own container. Keep chopped raw veggies separated or bagged for easy grabbing.
The "Eating Thrice" Assembly Method
By Monday morning, you have three large containers: Protein, Carbs, and Veggies. Now, you can assemble three distinct meals with minimal effort.

Bonus Tip: Embrace the Freezer
If you worry about food going bad, especially protein, dedicate a portion to the freezer immediately after cooking. Cooked chicken breast or ground meat freezes beautifully in portion-sized bags. That way, you ensure you always have emergency protein available later in the week or the following week.
Meal prepping is less about being a gourmet chef and more about being a smart strategist. By focusing on simple, mix-and-match components, you eliminate decision fatigue, save money, and ensure that when hunger strikes, health is the easiest option available.

Mastering the Kettlebell Swing: The Full-Body Move for Power and Conditioning
In a gym filled with complex machines, the humble kettlebell often gets overlooked. Once you master the kettlebell swing, you'll have access to one of the most effective conditioning and power-building exercises available anywhere.

Image courtesy of Vitaly Gariev via Unsplash
In a gym filled with complex machines, the humble kettlebell often gets overlooked. But this single piece of iron is arguably the most efficient tool for building full-body power, explosive conditioning, and incredible core stability. And the foundation of all kettlebell training is the kettlebell swing.
The kettlebell swing isn't an arm exercise; it’s a hip-hinge movement driven by your glutes and hamstrings. When performed correctly, it’s a powerful, low-impact exercise that can dramatically improve your athletic performance, trim your waistline, and build a powerful, resilient backside.
This move requires precise form, but once you master it, it will become one of the most effective and efficient exercises in your entire fitness routine.
Why the Swing is a Full-Body Masterpiece
The kettlebell swing works your body from head to toe in every rep:
Hips (The Engine): Your glutes and hamstrings are the primary movers, generating the explosive power that drives the bell upward.
Core (The Stabilizer): Your core and abs contract powerfully at the top of the swing to stop the bell's momentum, which is an amazing anti-extension core workout.
Shoulders/Back (The Guide): Your shoulders and back muscles act as guides, keeping the bell on track, but they should never be pulling the weight.
Four Steps to Mastering the Kettlebell Swing
Before you pick up the bell, you must master the hip hinge—the movement of pushing your hips backward while keeping your back flat.
1. The Setup (The Deadlift)
Place the kettlebell about a foot in front of you. Hinge at your hips (not your knees, like a squat) to grab the handle, keeping your back flat and your chest tall. Huddle over the bell like a gorilla, engaging your lats (back muscles) and creating tension.
2. The Hike Pass (The Power)
Hike the bell aggressively back between your legs, aiming high toward your groin. Your forearms should lightly brush your inner thighs. This is a very explosive, powerful action, loading your glutes and hamstrings like a spring.
3. The Explosive Snap (The Drive)
When the bell reaches its highest point in the back, immediately and explosively snap your hips forward. Imagine jumping forward, but your feet stay planted. Squeeze your glutes hard at the top and finish tall, standing straight up. The bell should float naturally to chest height (about parallel to the floor).
Crucial Rule: The swing is a thrust, not a lift. Your shoulders should feel relaxed, and the power should come entirely from the hips.
4. The Finish (The Plank)
At the very top of the swing, your body should be in a solid, braced position—a standing plank. Your glutes are squeezed, your core is tight, and your body is in a straight line. Do not let your back arch backward (hyperextend) at the top. This powerful core contraction is what builds your stable midsection.
Common Mistakes to Avoid
The Squat Swing: If you bend your knees and squat down too much, you lose the powerful hamstring/glute drive. Remember: it's a hip hinge, not a squat.
The Arm Lift: If you are actively lifting the bell with your arms, the bell is too heavy or you aren't snapping your hips hard enough. Your arms are just ropes; the hips are the engine.
The Back Arch: Allowing your back to arch at the top of the swing is the quickest way to get hurt. Squeeze your glutes and brace your core at the top.
Start with a light to moderate weight (e.g., 8kg/18lbs for women, 16kg/35lbs for men) and practice sets of 10 slow, perfect reps until the hip hinge feels completely natural. Once you master the swing, you'll have access to one of the most effective conditioning and power-building exercises available anywhere.

The Power of Consistency: Turning Motivation into a Lifelong Habit
Motivation is like a lightning strike, powerful and exciting, but it rarely lasts. If you rely on motivation to stay fit, you're setting yourself up for a failure cycle.

We've all been there: January 1st hits, you're bursting with motivation, you buy new gear, and you hit the gym hard for two weeks. Then, life gets in the way. Work piles up, you miss one day, and suddenly two months have gone by.
Motivation is like a lightning strike, powerful and exciting, but it rarely lasts. If you rely on motivation to stay fit, you're setting yourself up for a failure cycle. The secret to fitness that lasts, the kind that builds your legacy of health, isn't motivation. It's consistency.
Consistency is the quiet, reliable foundation that allows your effort to compound over time. Here is how to stop chasing motivation and start building the powerful habit of consistency.
1. Lower the Bar (The Five-Minute Rule)
The number one reason people break consistency is that their minimum expectation is too high. If you set a goal of "I must do an hour at the gym," and you only have 30 minutes, you often skip the workout entirely because you feel like you "failed."
The Habit Hack: Lower your minimum requirement until it's almost impossible to fail. Tell yourself, "I just need to put on my workout shoes," or "I just need to do 5 minutes of stretching."
Why it works: Showing up is the hardest part. Once you start that 5-minute task, you'll often find the motivation to continue for 20 or 30 minutes. If you still stop after 5 minutes, you still win because you maintained your habit streak. Consistency trumps intensity every time.
2. Use the 'Habit Stack' Principle
Consistency thrives on routine. You shouldn't try to cram a new workout habit into an already busy day; instead, you should attach it to an existing habit you already do automatically.
The Formula: [After I do X, I will do Y.]
Instead of: "I need to work out tonight."
Try: "After I finish brushing my teeth in the morning, I will do 10 bodyweight squats."
Why it works: Your brain uses less energy when a habit is linked to a strong cue. The automatic action (X) cues the desired action (Y), making it feel less like a choice and more like the next logical step.
3. Stop Seeking Perfection
Perfection is the enemy of consistency. If you believe your diet needs to be 100% clean every day, one cookie can make you feel like the whole day is ruined, leading to a downward spiral. The same goes for the gym: if you miss one day, don't let that one miss turn into a week of misses.
The Strategy: The 80/20 Rule: Aim for consistency 80% of the time, and give yourself grace for the other 20%. If you miss a workout, don't punish yourself. Just make sure you do the 5-minute minimum tomorrow.
Focus on the Streak: Track your consistency on a calendar. Your goal is to maintain the streak. If you have to break it, keep the break short. Never miss twice in a row.
4. Connect to Your 'Why' (The Legacy)
Motivation focuses on the immediate reward ("I want to look good for vacation"). Consistency focuses on the long-term identity ("I am the type of person who stays healthy and strong").
The Shift: When you feel unmotivated, don't ask yourself, "Do I feel like working out?" Ask yourself, "What kind of person do I want to be in 10 years?"
The Legacy: Your actions today are building your health legacy. Every time you show up (even for 5 minutes), you are reinforcing your identity as a dedicated, strong, and healthy individual. That powerful, future-focused reason is far stronger than any fleeting burst of motivation.
Consistency is the ultimate compounding factor in fitness. Small, repeatable actions, performed reliably over a long period, generate massive results that motivation alone can never achieve. Commit to showing up every day, and your lifelong results will take care of themselves.

Build Your Mobility ‘Flow’: A 10-Minute Routine for Pain-Free Hips and Shoulders
If you sit for hours every day, you know the feeling: tight hips, rounded shoulders, and a stiff lower back. While stretching helps, the real key to solving desk posture is mobility work.

If you sit for hours every day, you know the feeling: tight hips, rounded shoulders, and a stiff lower back. This common issue, often called "desk posture," isn't just uncomfortable, it restricts your movement, limits your workout performance, and can lead to chronic pain over time.
While stretching helps, the real key to solving desk posture is mobility work: actively moving your joints through their full range of motion. We're not talking about slow, static stretching; we're talking about a fluid, 10-minute routine, or "flow," that actively lubricates your stiffest joints.
This simple flow is designed to target the two most common problem areas for active adults: the hips (which get tight from sitting) and the shoulders (which slouch forward). Add this to your morning routine or take a break in the middle of your workday, and watch your pain melt away.
The 10-Minute Mobility Flow
Perform each movement for 30–60 seconds, focusing on smooth, controlled motion. Move directly from one exercise to the next with minimal rest.
1. Cat-Cow with Torso Rotation (Spinal Health)
This move is the perfect way to warm up your spine and connect your breath to your movement.
How to do it: Start on your hands and knees. Slowly drop your belly and lift your gaze (Cow). Then, round your spine toward the ceiling and tuck your chin (Cat). After a few reps, pause in the neutral position and thread one arm under your body, resting your shoulder near the floor (Torso Rotation). Hold briefly, then return and switch sides.
Focus: Think about isolating each part of your spine and moving slowly. This frees up the middle and upper back, which are vital for good posture.
2. Hip Flexor Lunge with Reach (Hip Relief)
Sitting causes your hip flexors to shorten and tighten, pulling your pelvis out of alignment. This move aggressively lengthens them.
How to do it: Step forward into a deep lunge position, dropping your back knee to the floor (pad it if needed). Gently push your hips slightly forward until you feel a stretch in the front of your back hip. Now, raise the arm opposite your front leg and lean slightly to the side.
Focus: Squeeze the glute on your back leg—this is the secret to getting a deeper stretch in the hip flexor.
3. 90/90 Hip Internal/External Rotation (Hip Mobility)
This is a game-changer for hip health, as it trains your hips to rotate properly, which is crucial for squatting and walking.
How to do it: Sit on the floor. Bend both knees so they are pointing in opposite directions, forming two 90-degree angles (your front knee, and your trail knee). Keep your chest upright. Slowly rotate your knees to the opposite side without using your hands, switching which knee is leading.
Focus: Try to keep your chest tall. If you need to lean back on your hands, that’s okay, but focus on controlling the movement from deep inside your hip sockets.
4. Thoracic Spine Windmill (Shoulder Posture)
This move directly addresses the rounded posture caused by hunching over a screen, freeing up your upper back and shoulders.
How to do it: Lie on your side with both knees bent and pulled up toward your chest. Extend your top arm and move it in a slow, wide circle, keeping your lower arm on the floor. Follow your hand with your eyes. The goal is to get your top shoulder blade flat on the ground.
Focus: You should feel a deep stretch and rotation through your mid-back (the thoracic spine). This is key to letting your shoulders pull back naturally.
5. Wall Slides (Shoulder Stability and Alignment)
This finishes the flow by teaching your shoulder blades where they should be in space—down and back.
How to do it: Stand with your back flat against a wall. Press your lower back, head, and elbows against the wall. Slide your elbows up the wall, raising your arms as high as you can without letting your lower back arch or your elbows lift off the wall. Return to the start.
Focus: This move trains the muscles that prevent the "hunch" and improves the stability needed for overhead movement.
Make it a Habit, Not a Chore
These stiff-joint issues didn't happen overnight, and they won't go away overnight. But by committing just 10 minutes a day to this mobility flow, you are actively undoing the negative effects of modern life. You'll not only feel better when you stand up, but you'll be stronger and less prone to injury during all your favorite activities.

Hot & Cold Recovery: The Simple Science Behind Ice Baths, Saunas, and Your Fitness
Recovery is a skill. By strategically using hot and cold exposure, you move beyond just resting and actively accelerate your body's ability to repair, adapt, and get stronger for your next session.

This image was created using AI to avoid copyright issues while conveying the context of this article.
In the world of recovery, two things have stood the test of time, moving from ancient rituals to modern athletic staples: heat (saunas) and cold (ice baths or cryotherapy). These two extremes, often used together, are not just painful or relaxing treatments; they are powerful tools that activate specific biological responses to help you recover faster, reduce soreness, and even boost your mood.
While you don't need to build a sauna in your backyard, understanding the science behind hot and cold exposure can help you use simple versions (like a cold shower or a warm bath) to dramatically improve your results.
Here is a breakdown of the simple science behind hot and cold recovery and how to use them effectively.
The Power of Cold (Ice Baths, Cold Showers)
Cold exposure works primarily by creating a temporary, controlled shock to your system.
1. Reduces Inflammation and Soreness
The Science: Cold causes your blood vessels to constrict (tighten). When you get out of the cold, the vessels rapidly dilate (open up), creating a strong "flush" that moves metabolic waste (the byproducts of hard exercise) out of the muscles and brings fresh, oxygenated blood back in.
The Benefit: This process is thought to dull pain signals and reduce the inflammation that causes Delayed Onset Muscle Soreness (DOMS).
2. Boosts Mood and Focus
The Science: The shock of cold water activates the sympathetic nervous system and triggers a release of mood-boosting hormones like norepinephrine and dopamine. It’s also a powerful vagus nerve stimulus (as discussed in an earlier article!), helping improve your stress response.
The Benefit: You feel alert, focused, and often experience an elevated mood immediately afterward.
How to Use Cold:
Best Time: Immediately or soon after a very intense, high-damage workout (like a long run or heavy leg day).
Duration: Start with a 30–60 second blast of cold water at the end of your usual shower. For a true ice bath (if you choose to try one), aim for 3–5 minutes at 40-59°F.
The Power of Heat (Saunas, Hot Baths)
Heat exposure works in the opposite way, focusing on promoting blood flow and relaxation.
1. Enhances Blood Flow and Relaxation
The Science: Heat causes blood vessels to dilate (open), significantly increasing blood flow. This carries vital nutrients and oxygen to tired muscles and helps flush out toxins.
The Benefit: The heat promotes muscle relaxation, reduces tension, and creates a calming effect on the nervous system.
2. Supports Endurance and Cellular Health
The Science: Consistent heat exposure (especially regular sauna use) can increase your body’s production of Heat Shock Proteins (HSPs), which help repair damaged proteins and fight cellular stress. Some studies suggest heat exposure can also improve blood plasma volume, which aids in endurance.
The Benefit: Better muscle recovery and potential endurance gains over time.
3. The Longevity Factor: Reduced All-Cause Mortality
The Science: A landmark 20-year study of Finnish men found a powerful association between sauna frequency and longevity. Those who used a sauna 4 to 7 times per week had a 40% lower risk of death from any cause (all-cause mortality) compared to those who used it only once a week. This benefit is thought to be tied to improved cardiovascular health and reduced inflammation.
The Benefit: Regular heat exposure, particularly through consistent sauna use, may be one of the simplest, most relaxing ways to protect your heart and support a longer, healthier lifespan.
How to Use Heat:
Best Time: 30 minutes to a few hours after your workout, or on a rest day. Caution: Avoid intense heat immediately after a strength workout, as the extreme heat may interfere with some muscle-building signals.
Duration: 15–30 minutes in a sauna (if available) or a warm bath. Always hydrate well before and after.
The Hot-Cold Contrast (The Best of Both Worlds)
Combining hot and cold (Contrast Therapy) is thought to create a powerful "pumping" effect—the vessels constrict in the cold, then dilate in the heat, driving fresh blood in and flushing waste out.
How to Try It: After your workout, alternate between 1–2 minutes in a cold shower (as cold as you can stand) and 2–3 minutes in a hot shower, repeating 3–4 times. Always finish on the cold cycle.
Recovery is a skill. By strategically using hot and cold exposure, you move beyond just resting and actively accelerate your body's ability to repair, adapt, and get stronger for your next session.

Bodyweight Masterclass: The 5-Move Routine You Need to Stay Strong Anywhere
This 5-move routine is a full-body solution that can be done anywhere, anytime, in about 20 minutes!

Image courtesy of Rahul Gupta via Unsplash
Have you ever skipped a workout while traveling? Or felt stuck on the weekend because you couldn't get to the gym? The truth is, your body is the only piece of equipment you truly need. Bodyweight training: using your own resistance to build strength is the ultimate, zero-excuse workout.
Bodyweight exercises are not just for beginners; they are a masterclass in fundamental strength, stability, and movement control. They force you to engage your core, focus on perfect form, and build functional strength that translates directly to everyday life and better performance when you do hit the weights.
This 5-move routine is a full-body solution that can be done anywhere, anytime, in about 20 minutes. It's designed to build strength, mobility, and a lasting foundation of fitness.
The 5-Move Bodyweight Masterclass
Perform each exercise for 10–15 repetitions (per side, where applicable). Rest for 60–90 seconds after completing all five moves, then repeat the entire circuit 3–4 times.
1. The Perfect Squat (Lower Body Strength)
The squat is a foundational movement. This exercise strengthens your glutes, quads, and hamstrings, and improves mobility in your hips and ankles.
How to Master It: Stand with your feet shoulder-width apart. Imagine you are sitting back into a chair. Keep your chest up, drive your knees out, and sit down until your thighs are parallel to the floor (or as low as your mobility allows). Push through your whole foot to stand back up. Focus on keeping your back straight.
2. The Push-Up (Upper Body Pushing Strength)
The push-up is the king of upper body pressing exercises, building strength in your chest, shoulders, and triceps, all while demanding significant core stability.
How to Master It: Start in a plank position. Keep your body in a straight line from your head to your heels (no sagging hips!). Lower your chest toward the floor, keeping your elbows tucked back at about a 45-degree angle from your body. Push back up. Too hard? Place your hands on an elevated surface like a bench or a sturdy chair. Too easy? Move your hands closer together or elevate your feet.
3. The Reverse Lunge (Single-Leg Stability)
Single-leg exercises like the reverse lunge are essential for building balance, stability, and evening out strength imbalances between your legs.
How to Master It: Stand tall. Step back with one foot, lowering your body until both knees are bent at a 90-degree angle. Your back knee should hover just above the floor. Push off your back foot to return to the start. The reverse lunge is generally easier on the knees than a forward lunge. Focus on keeping your front knee aligned over your ankle.
4. The Plank (Core Stability and Endurance)
The plank isn't just a core move; it's a test of total body tension. It strengthens your entire core, back, and shoulders by forcing them to work together to maintain a rigid, straight line.
How to Master It: Get into a push-up position, or rest on your forearms. Squeeze your glutes hard and tuck your pelvis slightly to prevent your lower back from sagging. Pull your belly button in toward your spine. Hold this position for 30–60 seconds, or until you can no longer maintain perfect form.
5. The Super-Hero (Back and Glute Strength)
Often, people focus too much on the front of their body and forget about the back. The Super-Hero is a simple, effective way to strengthen your lower back, glutes, and hamstrings—all crucial for posture and injury prevention.
How to Master It: Lie face down on the floor with your arms extended forward. Keeping your head in a neutral position (look at the floor), simultaneously lift your arms, chest, and legs off the floor, squeezing your glutes as you lift. Hold the peak contraction for 1–2 seconds, then slowly lower. Perform 12–15 repetitions.
Consistency is Your Only Equipment
This 5-move routine hits every major muscle group in the body: pushing, pulling (implied by the reverse of the push-up), squatting, lunging, and core stabilization.
The biggest advantage of a bodyweight masterclass is that it removes all excuses. Whether you're at home on a Saturday, in a hotel room, or just want a quick, effective workout, your body is always ready to train. Make consistency your commitment, and watch your strength grow wherever life takes you.

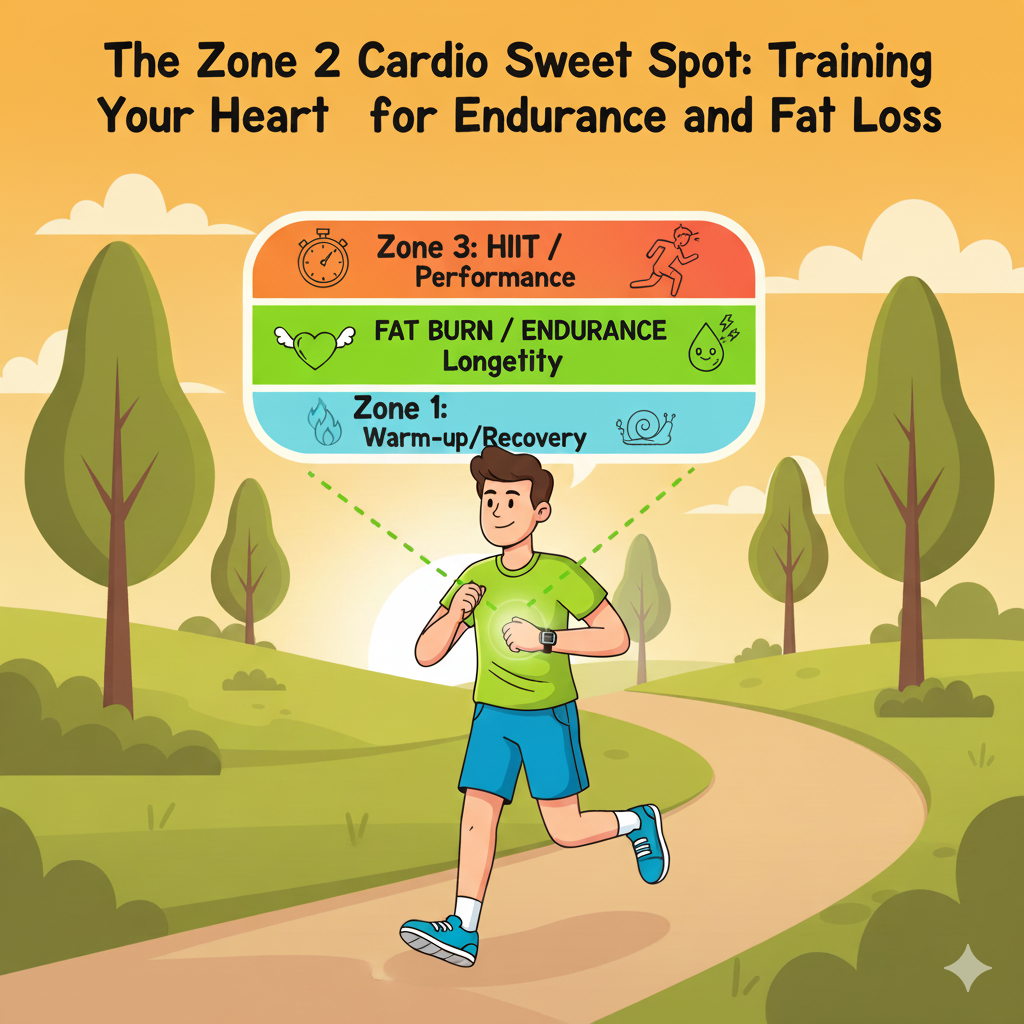
The Zone 2 Cardio Sweet Spot: Training Your Heart for Endurance and Fat Loss
What is Zone 2, and Why Does it Matter? By prioritizing Zone 2, you are choosing a sustainable, smart way to train your body for health and performance
When you do cardio, your effort level matters a lot. For years, the fitness world loved High-Intensity Interval Training (HIIT), and while that's great for quick, intense work, there's another zone that's quietly becoming the biggest secret to longevity, endurance, and efficient fat loss: Zone 2 Cardio.
Zone 2 is the sweet spot, that specific level of effort that is challenging enough to train your heart and cellular health but sustainable enough to maintain for a long period. This isn't about crushing yourself; it's about training smartly.
What is Zone 2, and Why Does it Matter?
Your heart rate is split into five "zones" based on effort. Zone 2 is typically defined as 60-70% of your Maximum Heart Rate (MHR).
How it feels: This is the "conversational pace." You should be able to hold a full conversation without gasping for air, but you should be breathing heavily enough that you wouldn't want to sing. It feels challenging but comfortable.
The Science: This is where your body is most efficient at burning fat for fuel. Your body relies heavily on your aerobic system, and this zone is the best for building and training your mitochondria (the power plants inside your cells). More mitochondria mean more cellular energy and a stronger engine for both endurance and fat burning.
The Three Major Benefits of Training in Zone 2":
Supercharges Your Fat-Burning Engine: In Zone 2, your body prioritizes burning stored fat instead of immediately reaching for easily accessible sugars (carbohydrates). This teaches your body to become metabolically flexible, meaning it gets better at tapping into its fat stores for long periods. This is key for sustained energy and fat loss.
The Ultimate Heart and Longevity Workout: Training your heart at this moderate intensity improves its ability to pump blood efficiently. Over time, consistent Zone 2 training increases the size and strength of your heart, making it a powerful, efficient pump. This directly correlates to a lower resting heart rate and better cardiovascular longevity. This is the training that truly adds healthy years to your life.
Builds a Strong Base Without Burning Out: Unlike high-intensity workouts that require long recovery times and can leave you feeling drained, Zone 2 training allows you to accumulate significant workout time without overstressing your body. You build a deep foundation of fitness that supports everything else you do from strength training to managing stress. You can often do a Zone 2 session and still feel fresh enough to tackle the rest of your day.
How to Find Your Zone 2 Sweet Spot
The most accurate way to find your MHR is with a lab test, but you can estimate it and use simple rules:
Estimate Your MHR: Subtract your age from 220. (Example: If you are 45, your MHR is 175 beats per minute).
Calculate Zone 2: Multiply your MHR by 0.6 and 0.7. (Example: 45-year-old: 175 times 0.6 = 105 BPM and 175 times 0.7 = 122.5 BPM. Zone 2 is roughly 105–123 BPM).
Use the Talk Test (Easiest Method): Start walking, cycling, or jogging. Gradually increase your pace until you can still say full sentences but you have to pause briefly for a breath after every few sentences. That's your Zone 2.
How to Incorporate Zone 2 Training
Duration: Aim for 30–60 minutes per session, three or more times per week (roughly 150 minutes per week). The longer you can sustain it, the more effective it is.
Activities: Brisk walking (especially with a slight incline or light backpack), cycling, elliptical, steady-paced swimming, or light jogging.
Don't Rush: If you find yourself pushing into Zone 3 (where conversation is difficult), slow down! The magic is in the sustainability of the effort, not the speed.
By prioritizing Zone 2, you are choosing a sustainable, smart way to train your body for health and performance, a strategy that pays dividends for a lifetime.

The Secret to a Killer Warm-up: 5 Dynamic Moves You Should Never Skip
A proper warm-up is one of the most critical parts of any workout for preparing your entire body, your muscles, joints, and nervous system, to move powerfully and safely.

Image courtesy of Gabin Vallet via Unsplash
When you head to the gym, do you jump straight into heavy lifting? Or maybe you hop on the treadmill for five minutes and call it a day? If so, you're making a mistake that could be costing you performance, and worse, increasing your risk of injury.
A proper warm-up is one of the most critical parts of any workout. It's not just about getting sweaty; it’s about preparing your entire body, your muscles, joints, and nervous system, to move powerfully and safely.
The secret to a "killer" warm-up lies in dynamic stretching. Unlike static stretching (holding a stretch for 30 seconds, which is best saved for after your workout), dynamic stretching involves continuous movement. It wakes up your muscles, increases blood flow, and improves the range of motion you need for your actual workout.
Here are 5 dynamic moves you should consider including to ensure your body is ready to perform at its best.
1. Cat-Cow/Bird-Dog Combo (Spine & Core)
This combination is excellent for waking up your core and spine, the central pillar of your entire body.
The Move (Cat-Cow): Start on your hands and knees. Slowly arch your back, dropping your belly and looking up (Cow). Then, round your spine up toward the ceiling, tucking your chin (Cat). This mobilizes your spine and gently warms your core.
The Move (Bird-Dog): From the hands-and-knees position, slowly extend your left arm forward and your right leg straight back, keeping your core tight and your hips level. Hold for a count, then switch sides.
Why it works: It trains your core to stabilize your spine while your limbs move, which is exactly what your core needs to do during lifting and athletic movements.
2. Leg Swings (Hips & Hamstrings)
Your hips are the engine of almost every major lift (squats, deadlifts) and athletic movement (running, jumping). Leg swings are the perfect way to open them up.
The Move: Stand next to a wall or stable surface for balance.
Front-to-Back: Swing one leg straight forward and backward, gradually increasing the height but keeping your torso upright. Do 10–15 swings per leg.
Side-to-Side: Turn to face the wall, and swing the same leg side-to-side across your body, opening up the inner and outer thigh. Do 10–15 swings per leg.
Why it works: It increases blood flow and mobility in your hip capsule, preparing your hamstrings and hip flexors for big movements without static stretching.
3. Arm Circles/Shoulder Dislocates (Shoulders)
Your shoulder joint is the most mobile, and most easily injured, joint in your body. It needs a careful warm-up before pushing, pulling, or overhead movements.
The Move (Arm Circles): Start with small circles, then gradually increase to large circles, swinging forward for 10 reps and then backward for 10 reps.
The Move (Shoulder Dislocates - Use a PVC Pipe or Towel): Hold a light PVC pipe or a towel stretched between your hands. Keeping your arms straight, slowly move the pipe over your head and behind your back, then return. Adjust your grip width so you feel a stretch, but no pain.
Why it works: It lubricates the shoulder joint and promotes a full, pain-free range of motion needed for movements like overhead pressing or pull-ups.
4. Goblet Squat (Hips, Knees, and Ankles)
The Goblet Squat is a "master" warm-up move because it prepares your entire lower body for complex work.
The Move: Hold a light dumbbell or kettlebell vertically against your chest. With your feet slightly wider than your hips, push your hips back and squat down as low as you can comfortably go, keeping your back straight and chest up. Rise back up. Do 10–12 slow, controlled repetitions.
Why it works: It activates your glutes and core while forcing mobility in your hips and ankles under a slight load. Doing this movement slowly is a great way to "pattern" the perfect squat form before you add heavy weight.
5. High Knees or Butt Kicks (Blood Flow & Heart Rate)
The final piece of the warm-up is getting your heart rate up and blood pumping to your working muscles.
The Move: Perform either high knees (jogging in place, driving your knees up toward your chest) or butt kicks (kicking your heels up toward your glutes). Do these for 30–60 seconds.
Why it works: This is a final burst of light activity that increases your core body temperature and signals your nervous system that it’s time to move quickly and powerfully.
A proper dynamic warm-up shouldn't take more than 8–10 minutes, but those few minutes are the best injury insurance and performance boost you can buy. Don't skip the secret to a killer workout; start moving dynamically today!

The 3 Types of Hunger: How to Tell if You're Truly Hungry or Just Bored
Have you ever finished a full meal and then, 30 minutes later, found yourself staring into the fridge? Understanding hunger is a core skill for mastering your nutrition and achieving lasting weight management.

Have you ever finished a full meal and then, 30 minutes later, found yourself staring into the fridge? Or maybe you eat dinner, sit down to watch TV, and suddenly realize you want a snack, even though your stomach doesn't feel empty.
Understanding hunger is a core skill for mastering your nutrition and achieving lasting weight management. Most people only recognize one kind of hunger (stomach pangs), but there are actually three distinct types of hunger. Learning to identify them allows you to choose the right response—eating when you need fuel, or using a different tool when you need comfort or distraction.
Here is your guide to understanding the three types of hunger and how to manage each one.
1. Physical Hunger (The Real Fuel Light)
This is the kind of hunger your body uses to signal a genuine need for energy. It's slow and gradual, like a fuel light coming on in a car.
What it feels like:
Stomach signals: Mild gurgling, a hollow feeling, or a slight discomfort that grows over time.
Body signals: Slight lack of focus, low energy, mild headache, or a feeling of true weakness.
Satisfaction: It is satisfied by any type of food whether it’s a salad, a sandwich, or a piece of chicken.
The Right Response: EAT. When your body signals true physical hunger, it needs fuel. Honor this signal by eating a balanced meal or snack containing protein, fiber, and healthy fats. This is your chance to nourish your body and maintain stable energy.
2. Emotional Hunger (The Craving for Comfort)
Emotional hunger is the urge to eat that is triggered by feelings, not by an empty stomach. It's often related to stress, boredom, loneliness, or happiness.
What it feels like:
Speed: It hits suddenly and urgently, like flipping a switch. You feel like you need food right now.
Specific cravings: It often targets specific, highly palatable foods like chips, cookies, ice cream, or pizza—rarely does it make you crave broccoli.
Guilt: After eating, it often leaves you with feelings of guilt or shame because it didn't solve the underlying problem (the emotion).
The Right Response: PAUSE AND ADDRESS. Food cannot fix an emotional problem. When this hits, pause for 5 minutes and ask yourself: "What am I truly hungry for?"
If bored: Get up and move (walk, do a chore).
If stressed: Do a calming activity (deep breathing, calling a friend, listening to music).
If tired: Take a short nap or step away from your screen.
3. Sensory Hunger (The Smell/Sight Trigger)
Sensory hunger is triggered by your senses: seeing, smelling, or hearing food. This is the hunger you feel when you walk past a bakery or watch a commercial for your favorite food.
What it feels like:
External cues: The hunger is triggered entirely by something outside your body. Your stomach might be full, but the smell of coffee and a donut makes you feel like you must have one.
Short-lived: The feeling is often intense but fades quickly once the cue is removed.
The Right Response: DISTRACT AND WAIT. This type of hunger is usually the easiest to manage with a short distraction.
Try this: Brush your teeth, chew a piece of gum, grab a glass of water, or simply walk away from the sight or smell of the food. Since this hunger is based on external stimulation, removing that stimulation often makes the craving disappear in 10-15 minutes.
Mastering Your Hunger
Learning to listen to your body and correctly identify which "fuel light" is on is one of the most powerful steps you can take toward mindful eating.
When you feel the urge to eat, take a slow, deep breath and use this quick check:
Is it gradual? (Physical: EAT)
Is it urgent and specific? (Emotional: ADDRESS THE FEELING)
Is it triggered by a sight or smell? (Sensory: DISTRACT)
By giving your body what it truly needs, whether that's calories, comfort, or just a 15-minute distraction, you take control of your plate and move closer to your long-term health goals.

Fueling the Fight: Essential Nutrition for a Stronger Immune System in Winter
As the weather gets colder and the holidays approach, your immune system suddenly has a bigger job to do. By consciously choosing nutrient-dense foods, you aren't just eating well, you are actively preparing your body to fight off the season's inevitable challenges.

Image courtesy of Abhishek Umrao via Unsplash
As the weather gets colder and the holidays approach, your immune system suddenly has a bigger job to do. While you can't stop every cold or flu, your diet is one of the most powerful tools you have to build a strong defense. Simply put, good nutrition is the foundation of a resilient immune system.
Think of your immune system as a highly trained army. Without the right supplies (nutrients), that army can't fight effectively. When you focus on specific vitamins, minerals, and proteins, you give your body the ammo it needs to stay healthy all winter long.
Here are the essential nutritional components your immune system relies on and where to find them.
1. Protein: The Army's Building Blocks
Your immune cells (like antibodies and white blood cells) are literally made of protein. Without enough protein, your body can't manufacture and deploy its defensive forces when a threat appears.
Why it works: Protein provides the amino acids necessary for T-cells and B-cells to function and multiply.
Where to find it: Lean meats (chicken, turkey), fish (especially salmon), eggs, dairy (yogurt, cottage cheese), and plant sources like beans, lentils, and tofu. Focus on getting a serving of protein at every meal.
2. Vitamin C: The Classic Cold Fighter
Vitamin C is probably the most famous immune booster, and for good reason. It’s a powerful antioxidant that protects immune cells from damage and helps them do their job better.
Why it works: It’s critical for white blood cell function, helping them quickly surround and destroy invading germs.
Where to find it: Don't just think oranges! Bell peppers (especially red and yellow), kiwi, strawberries, broccoli, and dark leafy greens are often higher in Vitamin C than citrus. Aim for a mix of colorful fruits and vegetables daily.
3. Vitamin D: The Sunlight Vitamin (Crucial in Winter)
Vitamin D is unique because your body mostly makes it from sun exposure. In November, when daylight is shorter and we spend more time inside, levels often drop, leaving the immune system vulnerable. Low Vitamin D levels are linked to a higher risk of respiratory infections.
Why it works: Vitamin D helps the immune system communicate and regulates the body's inflammatory response.
Where to find it: Fatty fish (salmon, tuna), fortified milk and cereals, and eggs. Since it's hard to get enough from food, supplementation is often recommended in the darker months. Consult with your doctor to find the right dosage.
4. Zinc: The Immune Regulator
Zinc is a mineral that acts like a traffic cop for your immune system, regulating how and when the immune cells respond. If you are deficient, your immune response can slow down significantly.
Why it works: It is involved in the development and function of immune cells. Taking zinc at the very start of a cold may help shorten its duration.
Where to find it: Oysters (the best source), red meat, poultry, beans, nuts, and whole grains.
5. The Power of the Gut (The First Line of Defense)
Around 70% of your immune system is located in your gut. A healthy gut lining and a diverse microbiome (the good bacteria) act as a major barrier against germs and keep your immune cells alert and balanced.
Why it works: A strong gut lining prevents unwanted substances from crossing into the bloodstream, which reduces overall inflammation and helps the immune system focus on real threats.
Where to find it:
Probiotics: Fermented foods like yogurt (with live and active cultures), kimchi, sauerkraut, and kefir.
Prebiotics (Fiber): Foods that feed the good bacteria, like oats, bananas, garlic, and onions.
Simple Winter Strategy
You don't need a complicated plan to boost your immune system. Just focus on consistency:
Eat the Rainbow: Make sure half your plate is filled with a variety of colorful vegetables and fruits to ensure you get a broad mix of vitamins (C, A, E).
Prioritize Protein: Ensure you hit your protein goals to literally build your immune defenses.
Consider a D: Talk to your healthcare provider about a Vitamin D supplement during the fall and winter months.
By consciously choosing nutrient-dense foods, you aren't just eating well, you are actively preparing your body to fight off the season's inevitable challenges, allowing you to stay strong and healthy for the holidays.

The Truth About Supplements: Which Ones are Worth Your Money (and Which are Just Hype)
The world of health and fitness supplements is a jungle.

The world of health and fitness supplements is a jungle. The shelves are packed with colorful containers promising everything from instant fat loss to massive muscle gains. It’s estimated that consumers spend billions every year on pills, powders, and potions, often without seeing any real benefit.
For anyone committed to long-term health, it’s important to understand the hierarchy of results:
Diet and Lifestyle: This is the foundation (sleep, real food, consistent training). This is 90% of your results.
Supplements: These are the finishing touches, designed to fill small gaps or slightly enhance performance. This is the remaining 10%.
If your foundation is shaky, no amount of supplements will save you. But once your core diet and training are solid, a few key supplements can provide real, evidence-based benefits.
Here is an honest breakdown of which supplements are genuinely worth your money and which ones are mostly marketing hype.
The Tried-and-True (The Essentials)
These supplements have the most scientific evidence and are generally safe and effective for filling common nutritional gaps or boosting performance.
1. Protein Powder (Whey, Casein, or Plant-Based)
What it does: Provides a quick, convenient source of protein to support muscle repair and recovery (especially useful after a workout or when you need a high-protein snack).
When it's worth it: When you struggle to hit your daily protein goal (aim for about 0.7–1 gram per pound of body weight).
The Hype Check: Skip the fancy "muscle-building blends" and focus on a simple, high-quality powder with minimal added sugars.
2. Creatine
What it does: This is the most studied and proven supplement for athletic performance. It helps your muscles generate more energy during short bursts of high-intensity exercise, leading to greater strength, power, and muscle mass over time.
When it's worth it: If you do any type of resistance training (lifting weights). It works for almost everyone and is very safe.
The Hype Check: You only need 3–5 grams per day. Don't worry about "loading" phases; consistency is key.
3. Vitamin D
What it does: Essential for bone health, immune function, and mood regulation. Many people, especially those who live in northern climates or spend a lot of time indoors, are deficient.
When it's worth it: If your blood work shows you are deficient, or if you get very little direct sun exposure (which is common, especially in the winter months).
The Hype Check: Check with your doctor to find the right dosage for you, as taking too much can be harmful.
The "Maybe Worth It" (Depends on Your Diet)
These supplements are useful if your diet is lacking in a specific area, but they aren't necessary for everyone.
1. Omega-3 Fatty Acids (Fish Oil)
What it does: Provides EPA and DHA, essential fats that reduce inflammation, support heart health, and contribute to brain function.
When it's worth it: If you don't eat oily fish (like salmon, mackerel, or sardines) at least two times per week. The anti-inflammatory benefits can be great for recovery.
The Hype Check: Look for a supplement that clearly lists the amounts of EPA and DHA on the label, and ensure the product is third-party tested for purity (to check for heavy metals).
2. Magnesium
What it does: Helps relax muscles, supports hundreds of chemical reactions in the body, and promotes better sleep (as we discussed in a previous article!).
When it's worth it: If you frequently experience muscle cramps, have high stress, or struggle with sleep (choose magnesium glycinate before bed).
The Hype Check: Magnesium oxide is cheap but poorly absorbed. Choose glycinate or malate for better results.
The Hype Zone (The Budget Killers)
These supplements usually aren't worth the money for the average person and often make huge claims that the science simply doesn't support.
1. BCAA (Branched-Chain Amino Acids)
The Reality: These three specific amino acids are important, but if you are already consuming enough protein (especially whey, which is rich in BCAAs), taking extra BCAAs won't provide any added benefit. They are mostly expensive, flavored water. Eat protein instead.
2. Fat Burners / Metabolism Boosters
The Reality: These usually contain a huge dose of caffeine and various herbal extracts. They might make you feel jittery (like you're burning fat), but they do little to actually boost your metabolism or cause significant, lasting weight loss. They often carry risks like increased heart rate and anxiety. Focus on clean eating and consistent training.
3. Detox Teas / Cleanses
The Reality: Your body has its own detox system: your liver and kidneys. These supplements are often just expensive laxatives and diuretics that cause temporary weight loss (water weight) and can be harmful to your digestive system. Focus on fiber and hydration.
The Final Word: Food First
No pill or powder can outsmart a poor diet. Supplements are exactly what the word implies: they are meant to supplement, or complete, a healthy, whole-food diet. If you are sleeping well, eating enough protein and vegetables, and training consistently, then consider adding one or two evidence-based supplements. If you aren't doing the basics, save your money and invest it in high-quality groceries instead.

Navigating the Food Aisle: How to Spot 'Health Halo' Foods and Find Truly Healthy Options
As an informed shopper, your job is to look past the large print on the front of the box and become an expert detective. Here is your guide to navigating the food aisle like an expert, focusing on what matters most.

Walk down any grocery store aisle today, and you’ll see words shouting at you: "Natural!" "Gluten-Free!" "Low-Fat!" "Made with Whole Grains!" These words are designed to make you feel good about putting a product in your cart. This is called a "health halo," where a product seems healthy because of one or two buzzwords, even if the rest of the ingredients tell a different story.
As an informed shopper, your job is to look past the large print on the front of the box and become an expert detective. Understanding how to spot these "health halo" foods is key to truly eating well and reaching your fitness goals.
Here is your guide to navigating the food aisle like an expert, focusing on what matters most.
Rule 1: Ignore the Claims on the Front (They Are Marketing)
The front of the package is a marketing tool, not a nutrition guide. Companies want you to focus on the one "good" thing they added, not the five "bad" things they left in.
"Made with Whole Grains!" This often means a small amount of whole grains was added to a base of highly refined white flour. Unless the first ingredient on the back label is "whole wheat," "whole oats," or another whole grain, treat this claim with suspicion.
"Natural." This is one of the trickiest terms because it has almost no legal meaning. It generally means the food doesn't contain artificial colors or flavors, but "natural" cane sugar is still sugar, and a bag of "natural" potato chips is still fried and salted.
"Low-Fat" or "Fat-Free." When fat is taken out of a food, the flavor usually goes with it. To make the food taste good, manufacturers often dump in large amounts of sugar, sodium, or artificial sweeteners. You might be avoiding one problem (fat) only to introduce a new, often worse one (sugar overload).
Rule 2: Focus on the Back (The Two Critical Areas)
Your real work happens when you flip the box over. There are two places where you should spend most of your time: the Ingredients List and the Nutrition Facts panel.
The Ingredients List: Keep It Short and Simple
The list of ingredients is a pure list of everything that went into the food, ordered by weight (the first ingredient is the most abundant).
Look for Short Lists: If a food has 20+ ingredients, and you can’t pronounce half of them, it’s highly processed. Choose foods with shorter ingredient lists.
Prioritize Whole Foods: The first few ingredients should be identifiable whole foods. For cereal, you want "whole oats" or "whole wheat," not "sugar," "corn syrup," or "refined flour."
Spot Hidden Sugars: Sugar goes by many names. If you see multiple types listed—like cane sugar, brown rice syrup, maltodextrin, high-fructose corn syrup, honey, or agave—they all count as added sugar. A food with three different sugar types listed is likely a sugar bomb.
The Nutrition Facts: Look at Sugar and Fiber
While calories are important, these two numbers give you the best picture of a product's true health value.
Added Sugars: Look specifically for the "Added Sugars" line. This tells you how much sugar was added by the manufacturer, separate from the natural sugars found in milk or fruit. Keep this number as close to zero as possible for processed foods.
Fiber Check: Remember fiber is your friend! Look for foods that have 3 grams of fiber or more per serving. A high fiber count helps counteract the negative effects of any remaining processed carbs and helps keep you full.
Rule 3: Choose Whole Foods First (The Easiest Aisle)
The absolute best way to avoid falling for "health halos" is to spend most of your time in the parts of the grocery store that don't need labels.
The Produce Section: Whole fruits and vegetables are always the best choice. They have a single ingredient: the food itself!
The Butcher/Fish Counter: Lean cuts of meat and fish, unseasoned, are pure protein sources.
The Dairy/Egg Section: Eggs, plain Greek yogurt, and plain milk are simple, nutrient-dense foods.
The goal isn't to be perfect, but to be informed. By ignoring the catchy marketing on the front of the package and becoming a smart shopper who checks the ingredients and nutrition facts, you empower yourself to make truly healthy choices that support your energy, your body composition, and your long-term fitness goals.

Why You Need to Get Strong in Your 40s and Beyond: The Case for Strength Training for Longevity
If you want to keep playing, traveling, and living life to the fullest well into your later years, you can’t afford to skip strength training.

If you're in your 40s, 50s, or beyond, you might think of fitness in terms of walking, jogging, or doing a bit of cardio to stay healthy. Those things are great for your heart, but there is one type of exercise that is truly non-negotiable for anyone who wants to live a long, independent, and high-quality life: strength training.
Strength training isn’t just about looking good, it’s about having a strong, resilient body that fights back against aging. It is, quite literally, the medicine you need to keep your independence, protect your joints, and manage your health for decades to come.
Here is the compelling case for why lifting weights (or using resistance bands, or your own body weight) becomes the most important workout you do after age 40.
1. The Fight Against Sarcopenia (Muscle Loss)
After about age 30, the average person starts to lose muscle mass at a rate of 3–8% per decade. This muscle loss is called sarcopenia, and it’s a silent thief of your strength and metabolism. By the time you hit your 60s or 70s, this loss can make simple tasks incredibly difficult.
The Solution: Strength training is the only way to stop and reverse sarcopenia. It sends a powerful signal to your muscles to not just hold onto the mass you have, but to actually build new muscle tissue. More muscle means more strength to carry groceries, pick up grandkids, and feel powerful every day.
2. Building Stronger Bones (The Osteoporosis Defense)
Osteoporosis, or weak bones, is a major health risk as we age, especially for women. A single fall that results in a hip fracture can seriously impact a person's independence and quality of life.
The Solution: Strength training is one of the best defenses against bone loss. When you lift weights, your muscles pull on your bones. This stress signals the bone cells to grow denser and stronger. This process is called bone density improvement. By stressing the bones in a safe, controlled way, you make them more resilient and less likely to break in a fall.
3. Boosting Your Metabolism (The Efficient Engine)
Muscle tissue is metabolically active, which means it burns more calories at rest than fat tissue does. As you lose muscle mass with age, your metabolism naturally slows down, making it easier to gain weight.
The Solution: When you build muscle through strength training, you effectively turn up your body’s furnace. This increase in muscle mass helps you burn more calories around the clock, making weight management much easier and more sustainable in the long run.
4. Supporting Hormonal Health
Aging is often accompanied by changes in hormone levels, which can affect everything from energy and mood to body composition.
The Solution: Resistance exercise has been shown to positively influence key hormones. It can help improve insulin sensitivity (important for fighting type 2 diabetes) and even boost natural growth hormone, which aids in recovery and repair. Strength training gives you a natural, healthy way to support your body's internal chemistry.
5. Keeping Your Independence (Functional Longevity)
This is the most critical reason of all. Longevity isn't just about living a long time; it's about living a high-quality long time.
The Solution: Strong legs and core muscles built through strength training are what allow you to get up off the floor without help, stand up from a low chair easily, and maintain balance to prevent falls. These are called functional movements, and they are the movements that define your ability to live independently. By prioritizing strength now, you are investing directly in your freedom tomorrow.
Getting Started Safely
It's never too late to start a strength program! If you are new to it, remember these three simple rules:
Prioritize Form Over Weight: Focus on doing every lift perfectly. If you can’t maintain good form, the weight is too heavy.
Focus on Compound Movements: These are exercises that use multiple joints and muscle groups, like squats, lunges, push-ups (or wall push-ups), and rows. These give you the most "bang for your buck."
Start with What You Have: You don't need a gym full of equipment. Bodyweight exercises (squats, lunges, planks) are a fantastic place to begin, or you can use inexpensive resistance bands or dumbbells.
If you want to keep playing, traveling, and living life to the fullest well into your later years, you can’t afford to skip strength training. It is the core investment in your legacy of health.

3 Rules for Maximizing Your Mobility: Ditch the Stiff Joints for Good
Do you ever feel stiff when you wake up in the morning? You're not alone. Many people confuse flexibility with mobility, but they're not quite the same.

Do you ever feel stiff when you wake up in the morning? Do everyday tasks like reaching for something on a high shelf or tying your shoes feel a little harder than they should? You're not alone. Many people confuse flexibility with mobility, but they're not quite the same. While flexibility is about how far a muscle can stretch, mobility is about how well your joints can move through their full range of motion, with control.
Good mobility is key to living a pain-free, active life, especially as we get older. It helps prevent injuries, improves your performance in workouts, and simply makes daily living more comfortable. Think of it this way: you can be flexible enough to touch your toes (good hamstring flexibility), but still have poor hip mobility if your hips feel "stuck" when you try to squat.
The good news is that you don't need to spend hours stretching to improve your mobility. By following three simple rules, you can dramatically improve how your body moves and feels.
Rule 1: Move It or Lose It (Regular Joint Motion)
Our bodies are designed to move. If a joint isn't regularly moved through its full range, it starts to get stiff. This is often called the "use it or lose it" principle. Sitting for long periods is one of the biggest enemies of good mobility.
Why it works: Moving your joints helps circulate the fluid inside them (synovial fluid), which acts like oil for a machine. It keeps the cartilage healthy and prevents stiffness. Regular movement also sends signals to your brain that "this joint is active and needs to stay mobile."
How to apply it:
Daily Mobility Flow: Spend 5-10 minutes each morning going through gentle movements for your major joints: neck rolls, shoulder circles, hip swings, ankle rotations, cat-cow stretches for your spine. You're not forcing a stretch, just gently moving.
Movement Breaks: If you have a desk job, set a timer to stand up and move every 30-60 minutes. Do some arm circles, hip rotations, or even a few gentle squats.
Incorporate into Warm-ups: Before any workout, dedicate 5 minutes to dynamic warm-ups that move your joints (like arm swings, leg swings, torso twists) rather than static stretching.
Rule 2: Strengthen Your End Ranges (Controlled Movement)
This is where mobility differs from just flexibility. It's not enough to just get into a position; you need to be strong and stable in that position. This means strengthening the muscles that support your joints throughout their full range of motion.
Why it works: Your brain won't let your body go into positions it doesn't feel safe in. If the muscles around a joint are weak when that joint is at its longest reach, your brain puts on the brakes to protect you. By building strength in these "end ranges," your brain trusts your body more, allowing greater, more controlled movement.
How to apply it:
Deep Squats: Work on getting into a full, deep squat (if safe for your knees) while keeping your chest up. This strengthens your hips, knees, and ankles through a large range.
Controlled Articular Rotations (CARs): These are slow, controlled circles for your joints (like hips, shoulders, spine) where you actively try to make the circle as big as possible without moving other parts of your body. This builds strength at the edge of your range.
Loaded Stretches: Instead of just holding a stretch, try to gently add a small amount of weight or resistance to a stretch (e.g., holding a light dumbbell while in a lunge stretch). This tells your body it's safe and strong in that lengthened position.
Rule 3: Breathe Deep, Breathe Often (Unlock Your Body)
This rule might surprise you, but your breathing deeply impacts your mobility, especially around your spine and rib cage. Shallow, chest breathing can create tension and stiffness.
Why it works: Your diaphragm, the main breathing muscle, is connected to your spine and core. Deep, belly breathing (diaphragmatic breathing) helps relax your core muscles, improves spine mobility, and signals your nervous system to calm down. When you’re relaxed, your body is less likely to hold onto tension.
How to apply it:
Diaphragmatic Breathing: Lie on your back, place one hand on your chest and one on your belly. Breathe in deeply through your nose, aiming to only raise your belly hand, not your chest hand. Exhale slowly through your mouth. Do this for 5 minutes daily.
Breath-Anchored Stretches: When you are doing any stretch, focus on exhaling deeply as you move into the stretch. The exhale helps your body relax and allows for greater range of motion.
Rib Cage Mobility: Combine deep breathing with gentle movements like side bends and rotations to free up your rib cage, which is often stiff from sitting.
The Path to Lasting Freedom of Movement
You don’t need to be a gymnast to have great mobility. By consistently applying these three rules—regularly moving your joints, strengthening your muscles through their full range, and practicing deep, conscious breathing—you can unlock a level of movement freedom you might not have thought possible. Ditch the stiffness, embrace effortless movement, and enjoy a more comfortable, active life for years to come.